The biggest problem on being a scrapbooker is that there are so many ways to get sidetracked. Some get into cards, some into altered art or ATC or circle journals or, worse, into blog-hopping... I am particular vulnerable to the last one :-), photography being the other one.
I am still very much a beginner, getting a good photo is still more a matter of good luck than skills, but I am spending more and more time trying to learn about my camera and master the manual more of my DSLR.
That's how I came across the term bokeh, which seems to refer to the blurry bits of your photo. Trivial? Google it and you find out how many people are obsessed about it.
I was thinking, right, but at the moment I am more worried about the bits that SHOULD be in focus but are not, thank you. Then I found out that you can trick your camera to make cute shaped bokehs.
Look at this photo of my Maneki Neko:
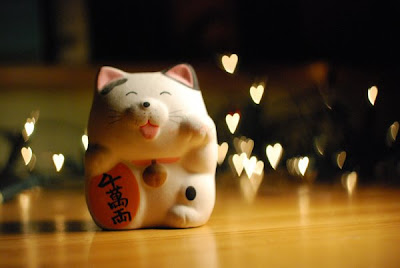
{ wanna know what is a maneki neco? check mella's blog }
Don't you love the cute hearts behind the cat? How did I do it? Look here.
You can cut out your heart (or whatever else) manually but I used a small heart shaped punch.
There's a bit of trial and error before you get a satisfactory result. The easiest way to get an array of heart shaped images in your photo is to use fairy lights. Test taking some photos of them (without the hood), you're after a nice round blurry light, just like here:
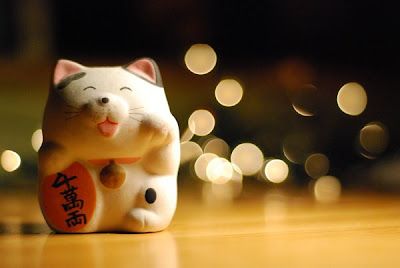
When you get the result above, put your hood on and take a photo with the same settings. Enjoy!
Sunday, 29 June 2008
Friday, 27 June 2008
Sleepless...
For the first time in ages, I am sleepless. After staring at a dark ceiling for an hour or so, I decide to use my time to take some photos (:-O) and now to post a minialbum I made about our holidays in Brazil. We were there in December last year and got to spend Christmas with my parents and my brother.
Cover:
Opening page:
Getting presents from Santa and my parents. Santa didn't forget that we weren't in Dublin for Christmas...
Stroll in the cute fishing village of Buzios:
It is an 8x8 album done digital, which I got printed in photobox. I put the layout together myself, but you can just load your pictures in the predesigned pages and write your own journaling. Easy!
Saturday, 14 June 2008
Note to self - printing at home
Most of the time, I print the photos I scrap in my printer at home, an HP Photosmart C5180. While sometimes the photo turned out OK, other times what I saw in print looked very different from what I saw in the screen.
I've asked advice and was told that I had to, first, calibrate my monitor, and then use the correct ICC profile for my printer and paper.
I still believe that my monitor is not properly calibrated, but today, after trying and trying I think I got the printer setting working if not perfectly, better. I know I'll forget all the steps so I decided to write it down here. Who knows, it might help someone else who uses PSE and the same printer.
1) On your PC, go to the start menu, select "Printer and Faxes", select your printer and then click on "File" -> "Printing Preferences...".
2) In the Printing Preferences window, select the "Printing shortcuts" tab. Select the proper paper/size configuration. In my case A4 Premium Plus paper. In "Color Management", select "Application Managed colors"
3) Select the "Colors" tab. Under "Color Management" select ICC. Under "Rendering Intent" select "Perceptual". Press "OK".
4) Start PSE, open your file.
5) (optional) Select "Image" -> "Convert Color profile" -> "Apply AdobeRGB profile".
6) Select "File" -> "Print...".
Under colour management you should see:
Color Handling = Photoshop Element Manages Colors
Source Space = AdobeRGB (if you did step 5, or if your photo was already using Adobe RGB)
Rendering Intent = Perceptual
Choose the appropriate profile for your paper/printer. In my case HP PS C6100_C8100 Prem Plus Photo.
7) Print it!
I know that someone with a proper understanding of colour management will finds 100s of holes here, but after spending a ton of paper and ink, this is the best I could manage. If someone reads this, I'll say congratulations, I hope you didn't fall asleep in the meantime, and if you found any errors or have a better way, please please tell me. Thanks!!!
Wednesday, 11 June 2008
Arty Kids
Tuesday, 3 June 2008
Tutorial - Special Effects with PSE
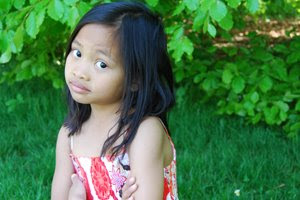
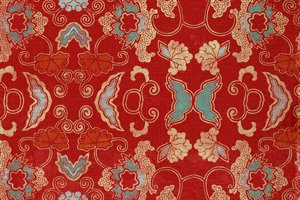
This is tutorial for yesterday's post. I used PSE6, a photo, and a texture. For this tutorial, I used a digital paper by Jessica Sprague.
1) Open your picture.
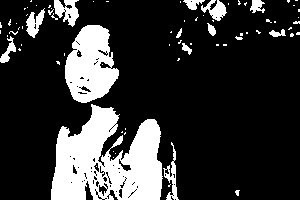
2) Make your photo black and white.
On the layers pallete on the bottom right side of the window, you will see a half-white/half-back circle. Click it and choose "Threshold...". You will see a histogram and a little white arrow at the bottom. Move it to the right or left until you are happy with what you see. Click OK.
3) Clean your image (optional step)
Do you see all these white bits in the background? I am going to get rid of them:
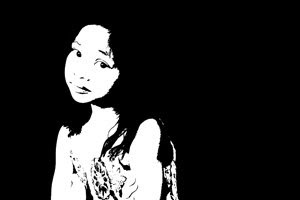
In the layers pallete, select the Threshould layer, right click on it and select "Merge down".
Set the background colour to black. (If your background is mostly white, set the foreground colour to white.) Select the paintbrush tool
paint all the undesired bits.
4) Open your texture file.
5)Copy texture file into your picture:
See the little icon with the texture file in the layers pallete? Drag it to your picture.
This should cover your picture completely, if it doesn't move it or resize it until it does.
6)The final step
In the layers pallete, make sure that the texture layer is selected. See the little drop down menu in the layers pallete, saying "Normal". Change it to "Screen" That's it. Done!
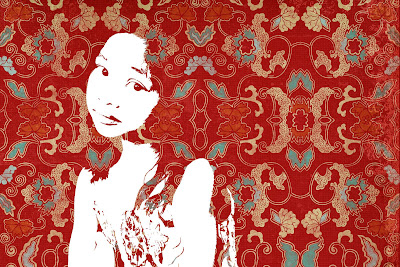
The final final picture:
OK, I made another change. I didn't like the texture on the eyes, and lips, so I painted these bits dark red in the texture layer.
About the picture: It works better with photos where the background is reasonably plain and where there is a good contrast between the subject and the background. Dark background will turn into a final picture with mostly texture. A light coloured background will make a picture like the ones I posted yesterday.
About the texture: Can be a photo or a digital paper. Because the texture is going to replace the darkest parts of the picture, it works better is the texture is darkish.
PSE experiments
Everytime I went to Tesco's, I saw a big poster featuring Cristiano Ronaldo (footballer - Portuguese squad & ManU) advertising Portuguese golf courses. His photo had an interesting effect, his face merged with some landscape photography and last week I thought - I can do it too.
This is my attempt with two photos of my kids playing in the beach.
After I finished, I went looking for the original photo in the web and found it here, you will have to download the PDF to see Cristiano, but you can have an idea looking at the cover. That's when I discovered that the photos are much more sophisticated than mine, blending texture and the black&white photo. I might have another go later but I am happy with the results I've got. I'll try to print it and if it looks good, I'll frame them.
The pattern in the photo is a from a texture gallery, this one taken by Andronicus Riyono.
It is really easy to do, I'll write a step-by-step another day, gotta go to bed now. Night night.
Subscribe to:
Posts (Atom)