There are often several ways on how to correct a certain problem, I'll show you my favourite way in Photoshop Elements 5 (aka PSE5) and/or PaintShopProXI (aka PSP XI).
Tutorial 1: How to correct colour cast in PSE5
I am not sure what is the correct definition of colour cast, but you know when the photo has a yellowish or bluish look, that's colour cast. I often get the yellowish tinge when I take a photo at night. This is technique that works if the photo has shows something that should be white.
Here's the before & after.

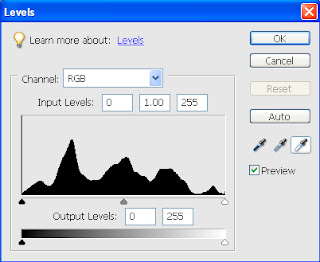
In PSE, go to Enhance -> Adjust Lighting -> Levels...

Click on the white dropper - the one in the right hand side - and then go to your picture and click on a point which should be white. I choose the sunlight bit on the door. That is it!
If you click on the wrong spot, you might end up with really weird colours, just click on "Reset" and try again.
PSP: Levels in PSP XI works the same way, with a slight better user interface. Go to Adjust -> Brightness and Contrast -> Levels... Another option is to try Adjust->Colour Balance.
Levels is a great tool, I will go back to it sometime.

1 comment:
This looks really interesting. I will pop back and study it some more! Thanks for sharing!
Post a Comment