1) Open your picture.

2) Make your photo black and white.
On the layers pallete on the bottom right side of the window, you will see a half-white/half-back circle. Click it and choose "Threshold...". You will see a histogram and a little white arrow at the bottom. Move it to the right or left until you are happy with what you see. Click OK.
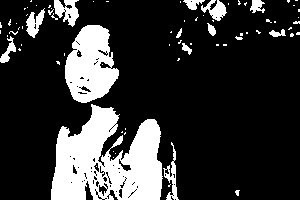
3) Clean your image (optional step)
Do you see all these white bits in the background? I am going to get rid of them:
In the layers pallete, select the Threshould layer, right click on it and select "Merge down".
Set the background colour to black. (If your background is mostly white, set the foreground colour to white.) Select the paintbrush tool
paint all the undesired bits.
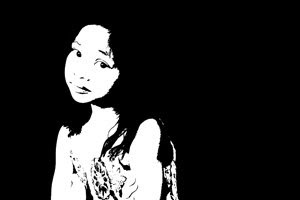
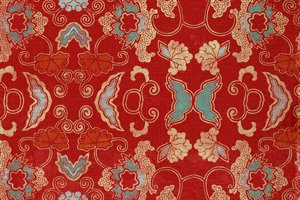
4) Open your texture file.
5)Copy texture file into your picture:
See the little icon with the texture file in the layers pallete? Drag it to your picture.
This should cover your picture completely, if it doesn't move it or resize it until it does.
6)The final step
In the layers pallete, make sure that the texture layer is selected. See the little drop down menu in the layers pallete, saying "Normal". Change it to "Screen" That's it. Done!
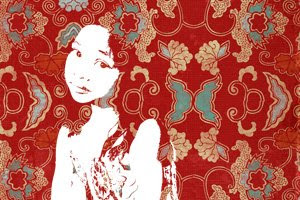
The final final picture:
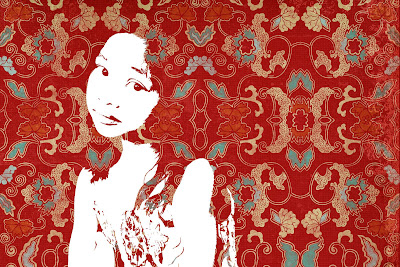
OK, I made another change. I didn't like the texture on the eyes, and lips, so I painted these bits dark red in the texture layer.
About the picture: It works better with photos where the background is reasonably plain and where there is a good contrast between the subject and the background. Dark background will turn into a final picture with mostly texture. A light coloured background will make a picture like the ones I posted yesterday.
About the texture: Can be a photo or a digital paper. Because the texture is going to replace the darkest parts of the picture, it works better is the texture is darkish.

14 comments:
OOOOh, I am going to have to try this!!
that is beautiful! love it...wish i had photoshop. i'm still in the dark ages over here with fireworks. oh well.
WOW! Cool tutorial. Thanks for taking the time to share your secrets!
Such cool effects! I'm definitely marking this for future reference. Thanks for sharing!
Elisa, this is really fantastic. I love it. I think I prefer it to yesterdays ones, but hard to decide. Still on a learning curve with GIMP but I might give this a go just to have tried it.
BTW, catching up on posts while we were away, I loved your home-scripted Primas.
This is stunning, I love the effect, I am going to give this a go later one today!!!! What a gorgeous pic of your DD too, she is so photogenic! Hope you are well, mandyxx
Wow, this is so beautiful. Thanks for the steps, I'll try.
I don't know if/how I would scrap with it, but it makes an AWESOME technique!! The photoshop freak in me LOVES this! Will have to try it out! Thanks for sharing! :)
Very cool Elisa. I have never played with PS but I am really going to have to try (I seem to be afraid of it although I used to be a software engineer!)
Wowzer Elisa, that is just the coolest thing I have ever seen...I can't wait to try it out. Thank you :-)
Wow Elisa so cool! I'm too afraid to "play" with pics but then I can just about open my e-mail!!! Fabby technique. Will keep this in mind and would love to see how you use it.
It's amazing Elisa - so impressive. How cool would that look on a mounted canvas! Just tried it on CS2 and I have got stuck on step one. Oh well back to the manual for me! Keep these turtorials coming - love them all!
Great Tutorial Elisa, and lovely photo!
Love it Elisa, so much that I gave it a go and the result is on my blog, Thanks for the tutorial.
http://jackies-space.blogspot.com/
Post a Comment