Project 12 (monthly summary layout) is the thing I have been doing longest, but this year I am way behind. I enjoy it and don't want to stop doing it because, it gives a summary of what we've been up to in 12 pages per year. And second, makes me work hard to come up with multiphoto layouts.
July 2012
I am not sure if I ever told this, but I work most of my layout in the computer. Then I make then in paper. This one was no exception. In this case I printed most directly on a 12x12 photo paper - the wood grain and photos. Then I put the strips of yellow neon papers and the Silhouette cut white paper strip. I had a beautiful digital paper between the photos, but it was light and didn't stand out so I aded some real papers between the photos. "Vintage" Basic Grey :-)
August 2012
I wanted to make a layout based on triangle shapes. Love the colourful paper - ILS is a Polish company which is making fabulous papers.
Showing posts with label silhouette. Show all posts
Sunday, 23 September 2012
Friday, 14 September 2012
My name is Heaven... (sharing a Silhouette file)
as in full of good intentions. One of the said intentions was to share a die-cut every couple of weeks or so.
That was two months ago. Finally I have my first share, a few summer words. I know summer is over but scrapbookers are always catching up as opposed to cardmakers who are always making ahead, so it might be of use to someone.
Here are some words in .studio format, for cutting with the Silhouette, download it here. It is my first upload in Media Fire, let me know if it doesn't work.
I used some of the words in my summer mini, which I'll post in the weekend. Here is one of the pages,where I used "travel".
That was two months ago. Finally I have my first share, a few summer words. I know summer is over but scrapbookers are always catching up as opposed to cardmakers who are always making ahead, so it might be of use to someone.
Here are some words in .studio format, for cutting with the Silhouette, download it here. It is my first upload in Media Fire, let me know if it doesn't work.
I used some of the words in my summer mini, which I'll post in the weekend. Here is one of the pages,where I used "travel".
Sunday, 19 August 2012
You are my Sun...
You are my sun, my moon, my guiding star,
my kind of wonderful, thats what you are...
Would someone please tell me where this come from so I can properly credit it?
As for the inspiration for the design, I can tell you where it comes from:
Or at least parcially, the comment in pinterest says it is a vintage Russian children's book but i can't find the original source. It fascinated me straight away, with the big sun and the multicoloured stars.
I used the Silhouette to cut the stars and sun from black cardstock and used an old American Crafts scrapbook page for the background. Usually my attempts to translate something very graphic to a scrap book page doesn't work too well, but I am happy with this one.
my kind of wonderful, thats what you are...
Would someone please tell me where this come from so I can properly credit it?
As for the inspiration for the design, I can tell you where it comes from:
Or at least parcially, the comment in pinterest says it is a vintage Russian children's book but i can't find the original source. It fascinated me straight away, with the big sun and the multicoloured stars.
I used the Silhouette to cut the stars and sun from black cardstock and used an old American Crafts scrapbook page for the background. Usually my attempts to translate something very graphic to a scrap book page doesn't work too well, but I am happy with this one.
Sunday, 22 July 2012
Have you heard of Skylanders?
Unless you have a child in your life, of a certain gender and of a certain age, you probably have not.
For the uninitiated, I'll explain: it is a Wii game, and Wikipedia explains:
"In Skylanders: Spyro's Adventure, players take on the role of a Portal Master who can control over 30 different characters, including Spyro. Players embark on a journey into a world where they will explore lands, battle creatures, collect gold and treasures, and solve puzzles while on a quest to save their world from Kaos, an evil Portal Master, whom they must defeat."
It fascinates my boy and lots of his school friends. The clever marketing ploy about this game is that it mixes the video part with actual toys. You can change ther role you play by placing a diferent character in a sort of box (which looks like a tree trunk to me). So, not only you have to buy the game, but you will be asked to buy endeless Skylanders so your child can progress in the game.
My son's granny gave him the game as a Christmas present (big hint from Daddy) and on his birthday last month he got 12+ new Skylanders from family and friends.
The profile was from a photo I took a while ago as part of my photo a day project:
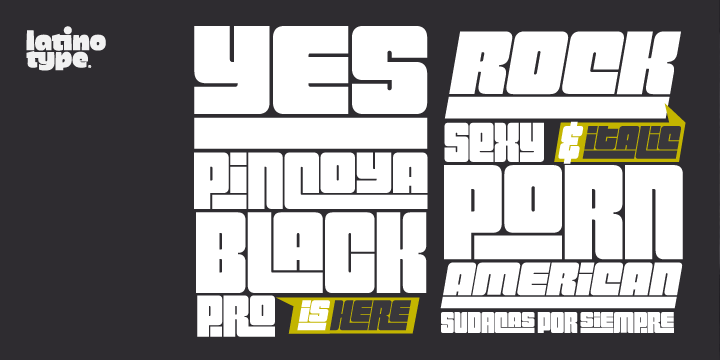
After that, I looked for a font that ressembled the Skylanders title. Pincoyablack is not exactly like it, but close enough.
After that was the inside of the silhouette which I wanted to be Skylanders-themed - a quick google search brought me to the person that drew the characters. His blog has the original sketches for download. I grabbed one and coloured with Promarkers.
After all that, it was easy, I had fun colouring with Promarkers.
Which I might be using more in the future... In a recent crop, Elaine Smyth gave a class on how to use the markers and I think a penny dropped. I has only half listening while I was trying to get my layout finished and I regret it, I should have paid more attention!
For the uninitiated, I'll explain: it is a Wii game, and Wikipedia explains:
"In Skylanders: Spyro's Adventure, players take on the role of a Portal Master who can control over 30 different characters, including Spyro. Players embark on a journey into a world where they will explore lands, battle creatures, collect gold and treasures, and solve puzzles while on a quest to save their world from Kaos, an evil Portal Master, whom they must defeat."
It fascinates my boy and lots of his school friends. The clever marketing ploy about this game is that it mixes the video part with actual toys. You can change ther role you play by placing a diferent character in a sort of box (which looks like a tree trunk to me). So, not only you have to buy the game, but you will be asked to buy endeless Skylanders so your child can progress in the game.
My son's granny gave him the game as a Christmas present (big hint from Daddy) and on his birthday last month he got 12+ new Skylanders from family and friends.
* Font: Pincoyablack (title), Century Gothic (journaling)
* Stamps: Studio Calico (letters), Viking Direct (date)
* Skylanders Image: Crabfu.com
* Other: Letraset Promarkers, Washi tape, Silhouette Cameo
It is a very simple layout that took a few resources to put together.
First the profile was inspired by a silhouette by Kennedy Garret that I found in pinterest:
The profile was from a photo I took a while ago as part of my photo a day project:
After that, I looked for a font that ressembled the Skylanders title. Pincoyablack is not exactly like it, but close enough.
After that was the inside of the silhouette which I wanted to be Skylanders-themed - a quick google search brought me to the person that drew the characters. His blog has the original sketches for download. I grabbed one and coloured with Promarkers.
After all that, it was easy, I had fun colouring with Promarkers.
Which I might be using more in the future... In a recent crop, Elaine Smyth gave a class on how to use the markers and I think a penny dropped. I has only half listening while I was trying to get my layout finished and I regret it, I should have paid more attention!
Saturday, 21 July 2012
Don't Grow Too Fast...
Often I have an idea for a layout design which is very simple to visualize but a pain to make. Often I give up on those ideas.
This time, I would have given up if I didn't have the Silhouette. Or I would have attempted a digital layout. Because the idea was simple, layers of cardstock, going from light to dark, each with a word on top, but can you imagine handcutting all these letters?
These were the only shade I had enough to make the sentence I wanted. However would have been much better on a brighter pink.
I am not sure if you can see it, but he chevrons go from dark pink to while, you can see through all the shades.
This time, I would have given up if I didn't have the Silhouette. Or I would have attempted a digital layout. Because the idea was simple, layers of cardstock, going from light to dark, each with a word on top, but can you imagine handcutting all these letters?
These were the only shade I had enough to make the sentence I wanted. However would have been much better on a brighter pink.
I am not sure if you can see it, but he chevrons go from dark pink to while, you can see through all the shades.
Tuesday, 26 June 2012
Some layout and a birthday banner
I am trying to get the right balance between design and content in a layout. While I want to make things that are pleasing to the eye, what matters most is the content - the photos and the story. With that in mind, I am making an effort to add more journaling to my layouts. Or at least most of them. There's no harm in a fluffy, cute layout every now and them. Like having a calorie-full, vitamin-poor treat after a nourishing meal.
This one is to be the cover page for 2011 project 12 (layout a month). The previous years' one was a labour of love, but 2011's is a quickie...
Inspired by this cool magazine illustration:
Two things I am using a lot: the Silhouette Cameo and the font Bebas Neue. Here's a birthday banner for my son, also using both of them:
* Patterned Paper: Basic Grey (blue dots), My Mind's Eye (red and pink; red and white), Echo Park (yellow), Pink Paislee (blue floral)
* Buttons: Crate Paper
* Fonts: Bebas Neue (title), Century Gothic (journaling)
* Tool: Silhouette Cameo
* Triangles shape: my own
This one is to be the cover page for 2011 project 12 (layout a month). The previous years' one was a labour of love, but 2011's is a quickie...
* Patterned Paper: Basic Grey
* Font: Bebas Neue
* Tool: Silhouette Cameo
Inspired by this cool magazine illustration:
Two things I am using a lot: the Silhouette Cameo and the font Bebas Neue. Here's a birthday banner for my son, also using both of them:
*Fonts: Bebas Neue, Console Relay
*Tool: Silhouette Cameo
*Other: Cardstock, eyelets, twine
Not every exciting, but there are two things that might interest you if you have a Silhouette or Craft Robot. Notice the Happy Birthday on the first flag? If I had cut only the letters, I'd have to glue them one by one trying to keep everything aligned. I added a line above and below the letters, just touching them so the whole thing is in one piece. Very clever idea from Patricia Zapata - she has a freebie on her blog with the idea, but the format was not compatible with the Cameo so I made my own.
The other one is the Console Relay font - an interesting font and bit unusual.
Monday, 21 May 2012
April'12
This is last month's summary layout - I am not up to day, I still have Jan/Feb/March to do, hehehe.
The photos were taking in Brazil and they're really colourful and they clashed with the circles, so I converted to b&w. The full colour pics are going to a mini-album, a simple photo album which I am making via photobox. That way I can have it printed 3 times, one for us, one for my bro and one for my parents.
I used the Silhouette to cut the sunburst circles and the title.
TFL!
The photos were taking in Brazil and they're really colourful and they clashed with the circles, so I converted to b&w. The full colour pics are going to a mini-album, a simple photo album which I am making via photobox. That way I can have it printed 3 times, one for us, one for my bro and one for my parents.
I used the Silhouette to cut the sunburst circles and the title.
TFL!
Tuesday, 15 May 2012
The Big Moon and the big mess
Ten days ago, I was driving my daughter to a birthday party when I looked towards Howth and noticed that the moon looked remarkably big. It was a clear evening and the whole scenery, I pointed it to my daughter but she wasn't that impressed...
After I dropped her at her friend's, I went home, grabbed my camera and headed back towards Howth. I meant to just stop the car and take a few shots, but my husband shouted to get the tripod too. By the time I got back, it was much darker and a cloud had covered the moon, so it didn't look as impressive, but still I took a few shots. I am glad I had the tripod, as handheld camera would have resulted in blurry photos. I didn't get the exposure right and the photos are very grainy, but I am glad I went back.
Later, looking on the web, I saw that it was indeed the day the moon was the closest to the Earth. There were some amazing pics taken that day, google big moon and see.
At home, I trying to handle another biggie, the big mess in my craft room.
Starting small, I chose to sort out my embroidery threads. Which I use for anything but embroidery. Sometimes I use them to tie something, or to hand stitch a layout or card.
Anyway, there were in a big tangle. These are only a few:
I was wishing I had wooden spools, and then I had a little brain wave. I looked that the Silhouette shapes and found a spool shade. Silhouette, by the way, is a digital cutting machine. Then I figured out how to fill the shape with a wood pattern, printed, cut, folded and here's the result:
After I finished, I cut a little notch at the top to secure the end of the thread:
And the whole set:
Not such a big crafty achievement, say you, but I am so pleased with it - it looks nice and organized and I found a new feature in the Silhouette. That's the advantage for not reading the manual. You find little surprised every now and then. TFL!
After I dropped her at her friend's, I went home, grabbed my camera and headed back towards Howth. I meant to just stop the car and take a few shots, but my husband shouted to get the tripod too. By the time I got back, it was much darker and a cloud had covered the moon, so it didn't look as impressive, but still I took a few shots. I am glad I had the tripod, as handheld camera would have resulted in blurry photos. I didn't get the exposure right and the photos are very grainy, but I am glad I went back.
Later, looking on the web, I saw that it was indeed the day the moon was the closest to the Earth. There were some amazing pics taken that day, google big moon and see.
At home, I trying to handle another biggie, the big mess in my craft room.
Starting small, I chose to sort out my embroidery threads. Which I use for anything but embroidery. Sometimes I use them to tie something, or to hand stitch a layout or card.
Anyway, there were in a big tangle. These are only a few:
I was wishing I had wooden spools, and then I had a little brain wave. I looked that the Silhouette shapes and found a spool shade. Silhouette, by the way, is a digital cutting machine. Then I figured out how to fill the shape with a wood pattern, printed, cut, folded and here's the result:
After I finished, I cut a little notch at the top to secure the end of the thread:
And the whole set:
Not such a big crafty achievement, say you, but I am so pleased with it - it looks nice and organized and I found a new feature in the Silhouette. That's the advantage for not reading the manual. You find little surprised every now and then. TFL!
Friday, 27 January 2012
Bold cursive fonts
One of the reasons I wanted the Silhouette was to cut titles for my scrapbook pages. I compiled a selection of beautiful bold cursive fonts. Apparently cursive does not imply necessary joined up, but that's what I mean by cursive here.
Wednesday, 11 January 2012
A new toy
My husband got me an eletronic cutting tool; the Silhouette Cameo.
I am still struggling with it as depending on the thickness of the material it needs to be set differently, and I've had occasions where the same settings didn't work for the exactly the same paper.
But when it works it is lots of fun. My first idea is based on Lisa Andersson's card shown here. After a few trial and errors I got the shape more or less right and combined with a snowflake shape which came with the machine to make this card:
TFL!
I am still struggling with it as depending on the thickness of the material it needs to be set differently, and I've had occasions where the same settings didn't work for the exactly the same paper.
But when it works it is lots of fun. My first idea is based on Lisa Andersson's card shown here. After a few trial and errors I got the shape more or less right and combined with a snowflake shape which came with the machine to make this card:
TFL!
Subscribe to:
Posts (Atom)