
![]()
It's a variation of a previous tutorial, but with enough different steps to warranty another tutorial. I've used PSE 5.

Step 2. Open a new layer and copy your photography in it.
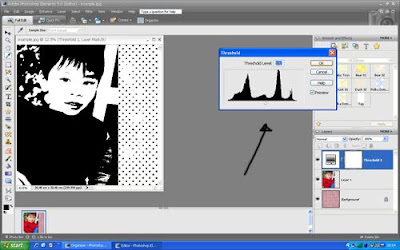
Step 3. In the layers pallete, click on the half-black/half-white circle icon (create adjustment layer) and select Threshold.

Step 4. Move the slider until you're happy with what you see. The background will become b&w too, but don't worry about it.
Step 5. Right click on the current layer (the adjustment layer), and select merge down.

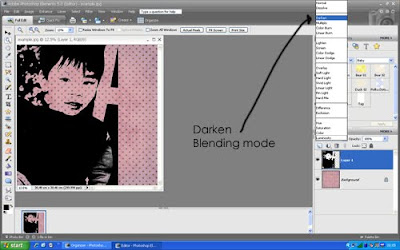
Step 6. Modify the blending mode (pull down menu in the top left of the layers palette) to Darken. Then you will get what you see below.
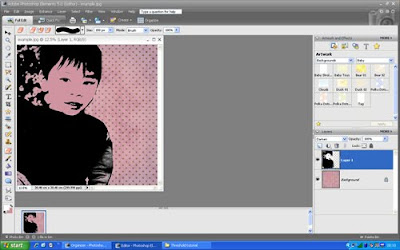
Step 7. The final touches. In the photo layer, use the eraser to remove the bits you don't want in the background. Then make the bottom layer (the pattern) active, select the brush tool and paint over the face. Faces usually don't look good with a pattern on it :-)
 That's it, folks!

Step 5. Right click on the current layer (the adjustment layer), and select merge down.

Step 6. Modify the blending mode (pull down menu in the top left of the layers palette) to Darken. Then you will get what you see below.

Step 7. The final touches. In the photo layer, use the eraser to remove the bits you don't want in the background. Then make the bottom layer (the pattern) active, select the brush tool and paint over the face. Faces usually don't look good with a pattern on it :-)
 That's it, folks!
2 comments:
I love that page! Thanks so much for the tutorial Elise!
great tutorial! I'll note this (:
Post a Comment